Vue+TypeScript tutorial
How to use our JavaScript based Gantt chart components in a TypeScript based Vue app.
Introduction
DlhSoft has developed Gantt Chart Hyper Library using pure JavaScript (and has also introduced TypeScript definitions for its components later.) That means the components can also be used when building Web apps using higher level frameworks, such as Vue (at the time of writing this text — version 2.6), supporting TypeScript and class style component syntax too, and we have defined wrapper components to help you out reaching this goal.
This tutorial assumes you are fine with having Node.js and other Web tools installed on your system. If you're running even newer versions of the referrenced software (that may have been recently published), don't worry, most probably all the commands will continue to run with very little or no changes at all. Also note that commands presented in this tutorial are for Windows based development systems, but macOS and Linux can also be used (and differences are indicated wherever they matter.)
Setting up your Vue+TypeScript app
In this tutorial we'll show how you can create a Vue app and then integrate DlhSoft Gantt chart components in its code. If you already have a Vue app and experience with the tools, see technical documentation instead.
A TypeScript based Vue app can be created using the official CLI (command line interface), available for installation with npm.
-
Install Node.js
Vue CLI requires Node.js, and npm (its node package manager). You can download and install it from nodejs.org.
-
Get Vue CLI
The command language interface (CLI) is used to create, build, run, and deploy custom Vue apps. Note that -g flag indicates that the package is installed globally, rather than the current folder.
npm install -g @vue/cli -
Create an app
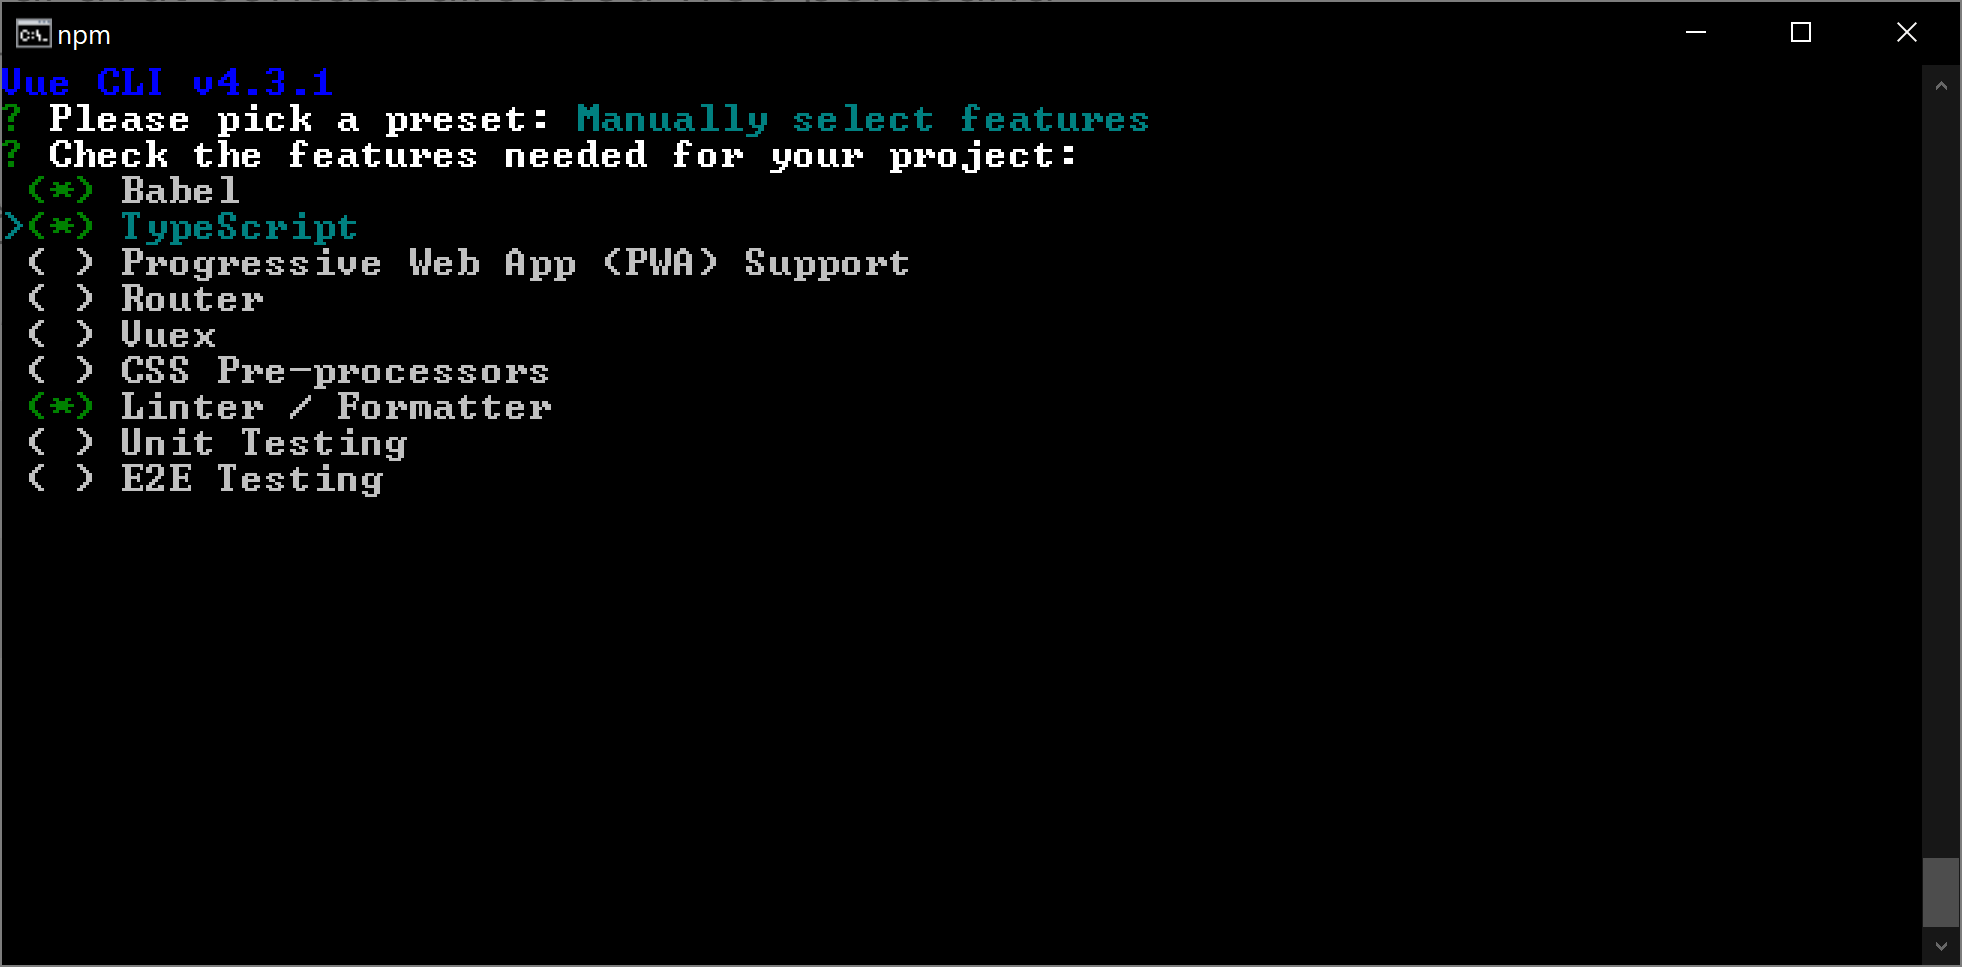
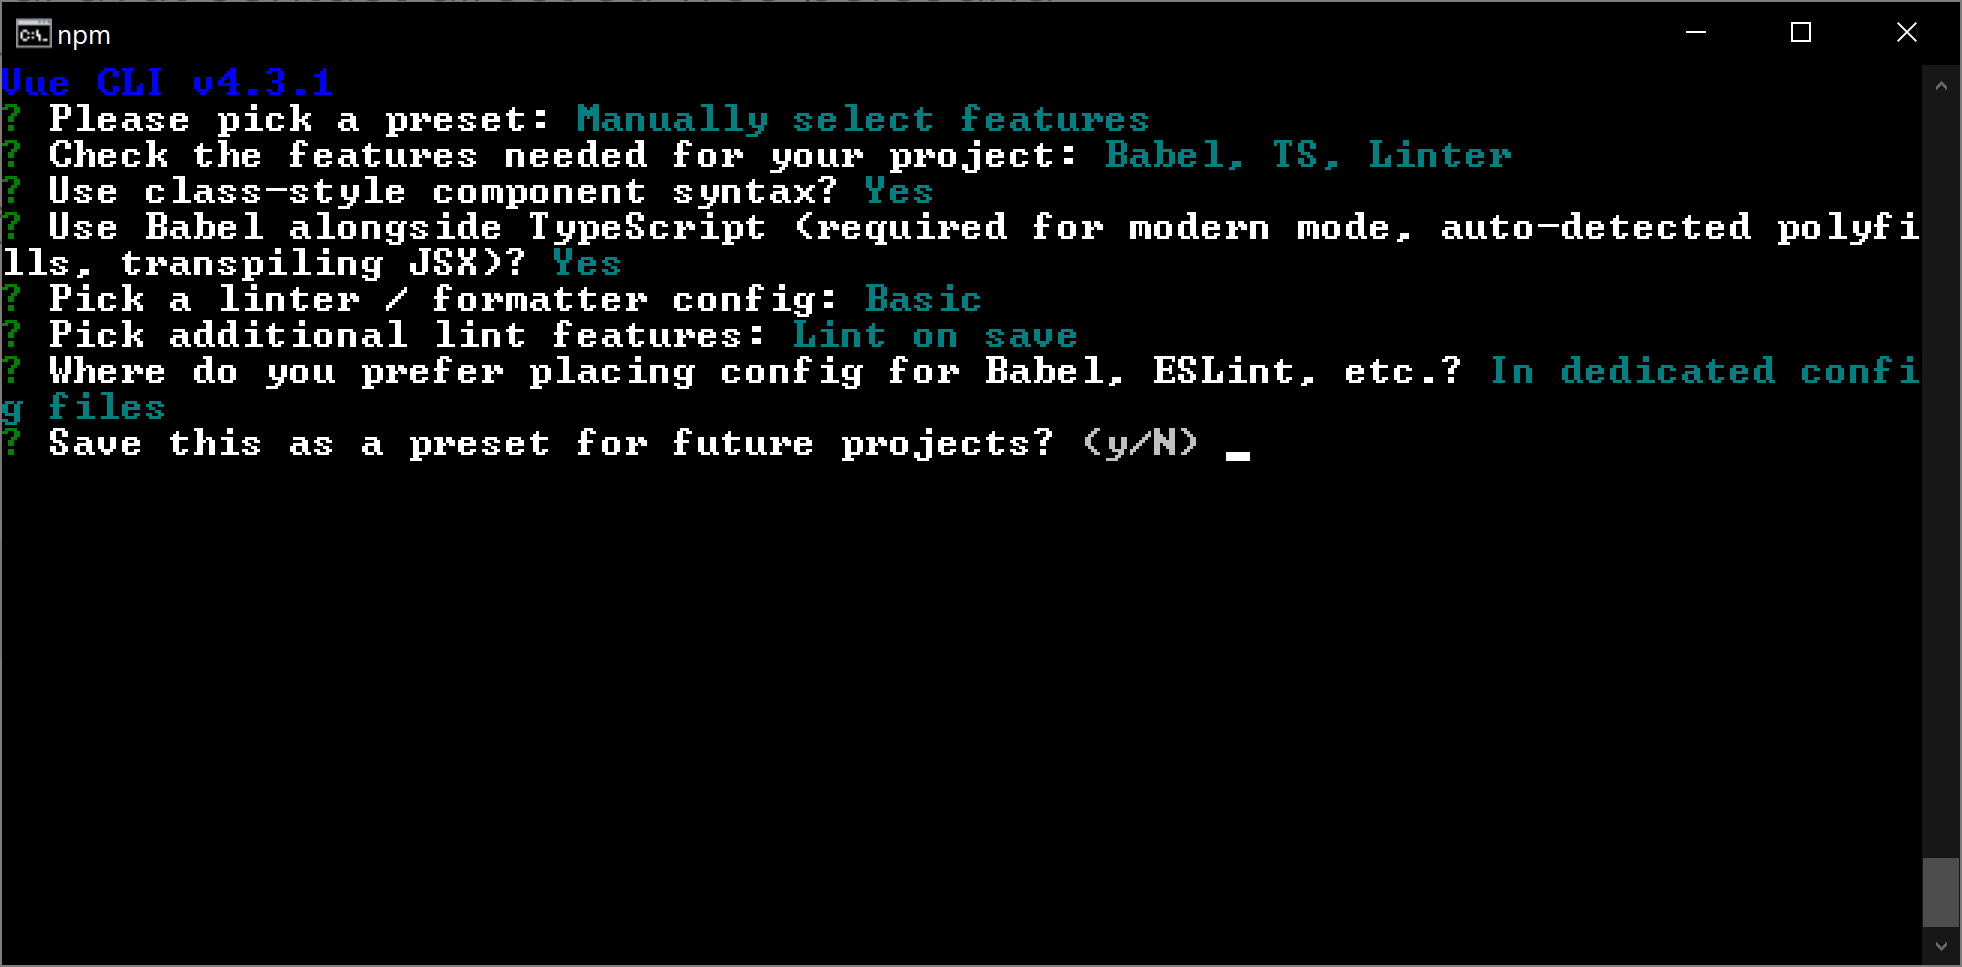
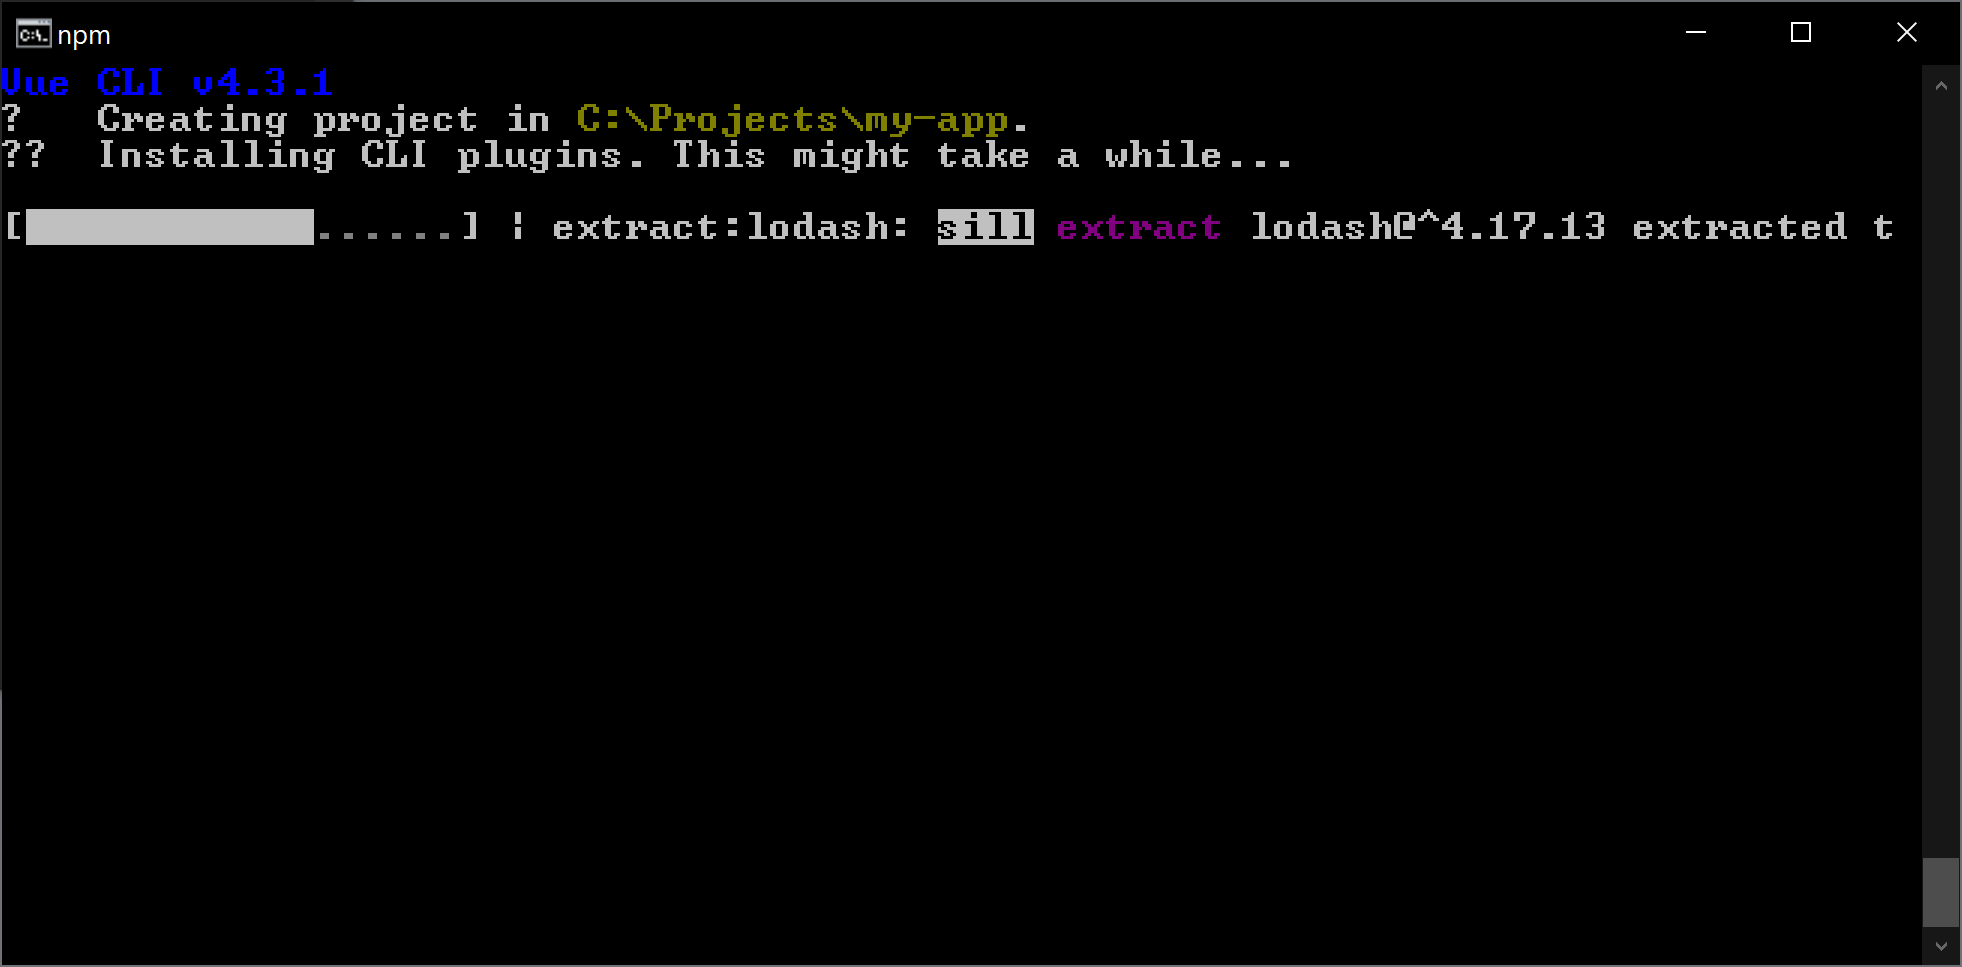
You can now use Vue CLI to create a new app. The vue create command below will create a new folder containing everything needed for development, so you should run it in Command prompt (or Terminal) after you changed the path to your root projects folder (whichever you choose.) Note that it will also prompt you for information about features to include in the initial app — do not accept the defaults by pressing the Enter key, but use the down arrow key to navigate to Manually select features preset which gives you further control. Then use Return key to navigate forward, and space bar to select TypeScript option. All other settings can then be left with their default values by repeatedly pressing Return key until the project creation begins.
cd projects
vue create my-app
-
Build, run and test the app
Executed within the project folder, npm run serve command allows you to build and run the app by hosting a local Web server on your machine — eventually accessible from a browser on your machine at http://localhost:8080.
cd my-app npm run serve -
Deploying for production purposes
Finally, you'll need to deploy the results for distribution purposes (into a subfolder of your project, dist). You can test this command now and/or only after you have also added DlhSoft components to the app (after the following section.)
npm run build
Get DlhSoft components
Our pure JavaScript components are not enclosed in a high level package — but they are available for download as .zip or .tar files. This means that they will not update automatically, but this is, in our opinion, a more generic approach. You can surely download the most up to date archive file whenever you need to use a more recent build, however, and we encourage you to subscribe to our core product news feed to know when new features arrive.
-
Download libraries
You can either download DlhSoft components directly as a .zip file (as stated above) and extract it yourself wherever you'd like (to be saved for further reference), or you can use npm to get them into an node_modules subfolder as you may be doing with your other packages. The difference is that you point npm to an URL rather than a package name.
npm install @dlhsoft/ganttcharthyperlibrary -
Determine which scripts you need
Open the extracted folder. In Windows, you can use explorer command, while on macOS and Linux open command should be used to view the contents of the destination folder. (Alternatively, you can run dir or ls commands to view the results directly in your Command Prompt or Terminal window; note that on macOS and Linux you should use slash / character to separate path parts, rather than backslash \.)
On Windows:
dir "node_modules/@dlhsoft/ganttcharthyperlibrary"On macOS and Linux:
ls node_modules/@dlhsoft/ganttcharthyperlibraryThe files below are available for you to use in your Vue app. The appropriate core .js files are needed for the Vue extension components to work. Other files are also available inside the folder, but you can safely ignore them.
Category Details Files Core JavaScript components Gantt chart, schedule chart, load chart
PERT chart, network diagramDlhSoft.ProjectData.GanttChart.HTML.Controls.js
DlhSoft.ProjectData.PertChart.HTML.Controls.jsOptional UI enhancers Date-time picker, multi-selector combo box DlhSoft.Data.HTML.Controls.js Optional XML import/export Project serializer DlhSoft.ProjectData.GanttChart.HTML.Controls.Extras.js Vue-TypeScript extensions Gantt chart, schedule chart, load chart
PERT chart, network diagramDlhSoft.ProjectData.GanttChart.Vue-TypeScript.Components/*.vue
DlhSoft.ProjectData.PertChart.Vue-TypeScript.Components/*.vue -
Copy the necessary files
The files in extracted folder may not be immediately available to use in your Vue app. You need to copy the files you need into one of your app's main folders, first. (We admit that if we'd have defined a JSON package files for our product this step would have been easier, but as previously indicated, we wanted to go with a more generic approach that wouldn't depend on any specific metadata in the archives to make things work.)
Your TypeScript based Vue app includes a src subfolder where all your Vue source code will eventually go. You'll also find a components folder inside it, and we recommend you to use it to host DlhSoft .vue files organized as they were in the original package. Finally, the core JavaScript files that Vue components rely on should be copied to public subfolder within your project, too. Copy the files using either Explorer or Finder, or at the command line prompt.
On Windows:
mkdir src\components\DlhSoft.ProjectData.GanttChart.Vue-TypeScript.Components
mkdir src\components\DlhSoft.ProjectData.PertChart.Vue-TypeScript.Components
copy node_modules\@DlhSoft\GanttChartHyperLibrary\DlhSoft.ProjectData.GanttChart.Vue-TypeScript.Components\*.vue src\components\DlhSoft.ProjectData.GanttChart.Vue-TypeScript.Components\
copy node_modules\@DlhSoft\GanttChartHyperLibrary\DlhSoft.ProjectData.PertChart.Vue-TypeScript.Components\*.vue src\components\DlhSoft.ProjectData.PertChart.Vue-TypeScript.Components\
copy node_modules\@DlhSoft\GanttChartHyperLibrary\DlhSoft.ProjectData.GanttChart.HTML.Controls.js public\
copy node_modules\@DlhSoft\GanttChartHyperLibrary\DlhSoft.ProjectData.PertChart.HTML.Controls.js public\
copy node_modules\@DlhSoft\GanttChartHyperLibrary\DlhSoft.Data.HTML.Controls.js public\
On macOS and Linux:
mkdir src/components/DlhSoft.ProjectData.GanttChart.Vue-TypeScript.Components mkdir src/components/DlhSoft.ProjectData.PertChart.Vue-TypeScript.Components cp node_modules/@dlhsoft/ganttcharthyperlibrary/DlhSoft.ProjectData.GanttChart.Vue-TypeScript.Components/*.vue src/components/DlhSoft.ProjectData.GanttChart.Vue-TypeScript.Components/ cp node_modules/@dlhsoft/ganttcharthyperlibrary/DlhSoft.ProjectData.PertChart.Vue-TypeScript.Components/*.vue src/components/DlhSoft.ProjectData.PertChart.Vue-TypeScript.Components/ cp node_modules/@dlhsoft/ganttcharthyperlibrary/DlhSoft.ProjectData.GanttChart.HTML.Controls.js public/ cp node_modules/@dlhsoft/ganttcharthyperlibrary/DlhSoft.ProjectData.PertChart.HTML.Controls.js public/ cp node_modules/@dlhsoft/ganttcharthyperlibrary/DlhSoft.Data.HTML.Controls.js public/ -
Reference core and extension scripts
Update index.html file (hosted in public subfolder of your Vue project), referencing the DlhSoft core script files that you need (in the HTML's head.)
<head> … <!-- DlhSoft Gantt Chart Hyper Library core --> <script src="DlhSoft.Data.HTML.Controls.js"><script> <script src="DlhSoft.ProjectData.GanttChart.HTML.Controls.js"><script> <script src="DlhSoft.ProjectData.PertChart.HTML.Controls.js"><script> </head> -
Import Vue components
Update App.vue or your vue container file (available in src subfolder of your Vue project), referencing the DlhSoft vue component files that you need (adding an import line in its script section and an entry in the @Component declaration.) Moreover, if you plan to use features of the core JavaScript library when setting up the data for the components (see sections below), you may set up a declaration for DlhSoft container to avoid TypeScript compiler errors, as well.
<script> import { Component, Vue } from 'vue-property-decorator'; import GanttChart from './components/DlhSoft.ProjectData.GanttChart.Vue-TypeScript.Components/GanttChart.vue'; declare let DlhSoft; @Component({ components: { GanttChart, }, }) … </script> -
Use DlhSoft components in your markup
To use Dlhsoft Vue components you simply need to place appropriately named elements in your markup (defining the user interface of your view), and set up the properties — items, settings, license, change — to the data you will also need to prepare for them in code. For example, replace the contents of the "app" div in temmplate section of App.vue file.
<template>
    <div id="app">
        <GanttChart v-bind:items="items" v-bind:settings="settings" v-bind:license="license"
                    v-on:change="onItemChanged"
                    style="min-height: 388px">
            …
        </GanttChart>
    </div>
</template>
The elements that can be used are listed below, mapped to the specific components they reference.
Component Element Details GanttChartView GanttChart Singe bar per row, e.g. project with tasks ScheduleChartView ScheduleChart Multiple bars per row, e.g. tasks assigned to resources LoadChartView LoadChart Allocations over time, e.g. resource load percents PertChartView PertChart PERT diagram, e.g. tasks displayed as arrows NetworkDiagramView NetworkDiagram Network diagram, e.g. PERT methodology -
Set up data
As mentioned in the previous step, you will need to also set up data for the component's properties in your component class's code, back in script section of App.vue file (or similarly, in the code of any container component in your project.) To set up the items and settings, use the fields supported by the core component, as detailed in core product's technical reference. You can use any type for the properties to avoid the need of importing (or redefining) appropriate interfaces, although you should be aware that TypeScript compiler may issue (otherwise harmless) warnings regarding this approach.
export default class App extends Vue {
  items!: any[];
  settings!: any;

  constructor() {
    super();

    const item1: any = { content: 'My summary task' };
    const item2: any = { content: 'My standard task', indentation: 1,
                         start: new Date(2012, 8, 2, 8, 0, 0), finish: new Date(2012, 8, 7, 16, 0, 0),
                         completedFinish: new Date(2012, 8, 5, 16, 0, 0), assignmentsContent: 'My resource' };
    const items: any[] = [item1, item2];
    const item3: any = { content: 'My milestone', indentation: 1,
                         start: new Date(2012, 8, 7, 16, 0, 0), isMilestone: true };
    items.push(item3);
    …
    const settings: any = { … };
    const license: string = "…"; // upon purchasing a product license from DlhSoft
    …
    this.items = items;
    this.settings = settings;
  }

  onItemChanged(args: any) {
    const item = args.item, propertyName = args.propertyName, isDirect = args.isDirect, isFinal = args.isFinal;
    if (!isDirect || !isFinal) // Skip internal changes, and changes occurred during drag operations.
      return;
    console.log(propertyName + ' changed for ' + item.content + '.');
  }
}
Properties that you may provide values for (applying to all components) are listed below.
Property Details items Actual data to be presented (e.g. task or resource items, depending on the specific component, see technical reference) settings Customizations for the appearance and behavior of the component (see technical reference) license String value generated by DlhSoft License Manager tool upon purchasing a product license (to remove nag screens) Events that you many hook up in your app (applying to all components) are also available:
Event Details change Called upon client side item changes